Over the past couple weeks I’ve had so many requests on what products I used on my garage floor. I figured it would be easier to jot down a post on what products I used & the tips I’d suggest to someone that wanted to do the same thing. I went into Home Depot yesterday and realized that their garage floor section was wiped out. I guess I’m not the only one with this idea during quarantine!
Facts: we spend a lot of our time in the garage because that is where our dartboard, random games, and drink fridge is. I’d be lying if I said we did not have neighbors gathered here almost every weekend during the quarantine for social distancing hangs. With a simple garage floor epoxy it took the space from looking dingy to a brighter more fun hang-out spot. And it was really easy, I did the project by myself in a couple days.
First things first, I had to figure out what was staying in the garage and what I was not using or needed to be thrown away and/or donated. This part was strangely calming. I love organizing and minimizing my stash (except for my photography equipment and my makeup/skincare, of course) after realizing how much random stuff was sitting on our shelves. I’d say emptying the garage was 100% the most time consuming part, but I woke up everyday at 7am to knock it out. I strategically planned the clean-up to be a day prior to garbage day. Once I had settled on what I was keeping, I moved everything into the guest bedroom of our home. I did feel slightly overwhelmed and worried that I’d make a mistake with the job I was just about to undertake, but forged through the fear. Things I left in the garage during the process were the refrigerator, our wooden work bench, and wire shelving units, but I’ll explain that part later on.
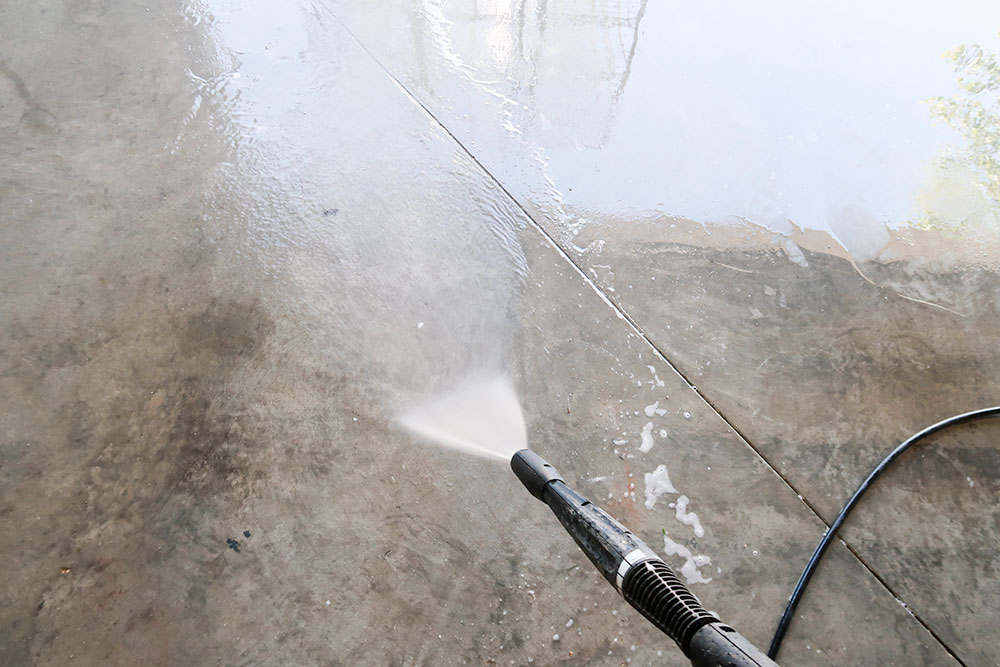
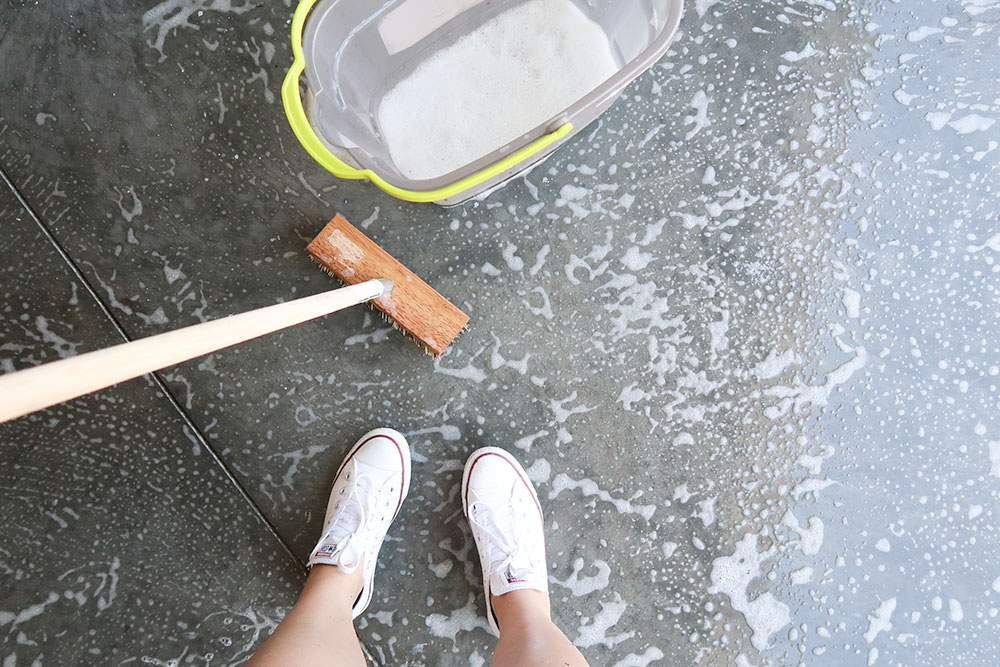
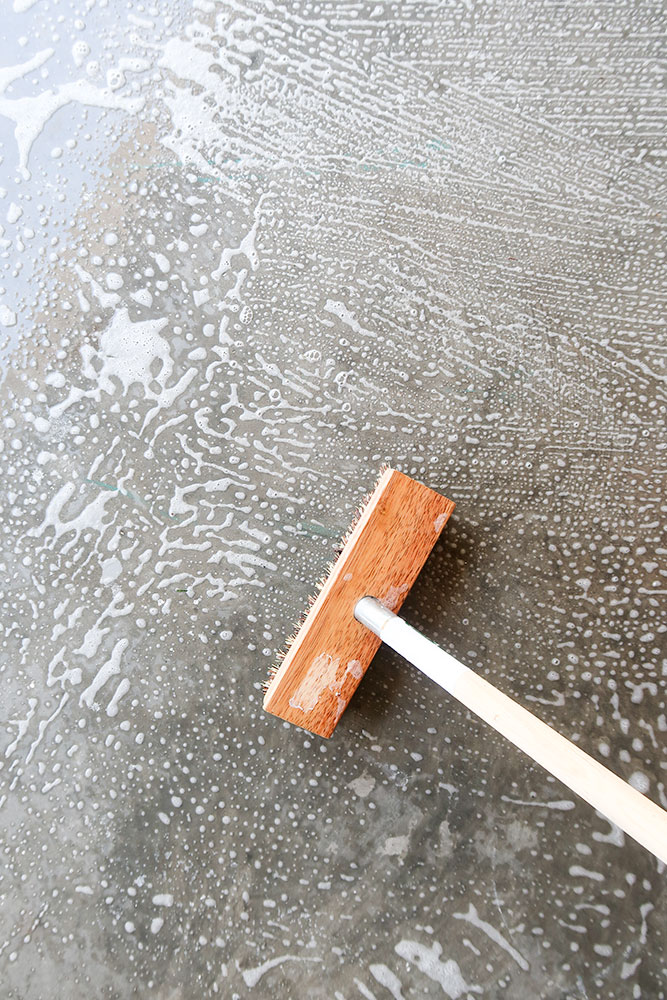
After the organizing and sorting was done, it was time to start on cleaning the concrete. I grabbed the degreaser and my trusty bucket and read the instructions. I had no clue what I was doing and read it like 403 times to be sure – I went with a 1:1 ratio of water and degreaser solution for the first wash. I started in the corner moving back to front in small sections. I used the scrubber brush to start buffing the liquid into the concrete. It does not bubble up like a soap would. Some people suggested renting a machine from Home Depot for this step, but as our garage was not extremely greasy, I used my scrub brush and that’s all. Look at it like it’s a good arm workout! After the whole floor was scrubbed, I used the pressure washer and washed it all away. Yes, it’s safe for driveways and plants/grassy areas outside. I believe I did this process 3-4x to make sure I cleaned it enough. When in doubt, keep cleaning, and I cannot stress this enough, you NEED a clean floor for the epoxy to stick to. The weather was typical Florida, so the floor did dry pretty quickly – especially after four rounds of cleaning. I also read to use a squeegee to get rid of excess water, but I found that the brush worked just fine at pushing excess water away.
On the degreaser bottle, it does suggest waiting 24 hours before doing anything else. So, just in case, I left it alone for 24 hours. Here’s where I’d suggest also etching in the same day after the cleaning, if you want to knock the job out quicker. I spread the days out to be sure I’d not mess up the painting bit. It was a lot of strenuous work, so if you’re like me and working alone – space it out and take the time to make sure it’s very clean.
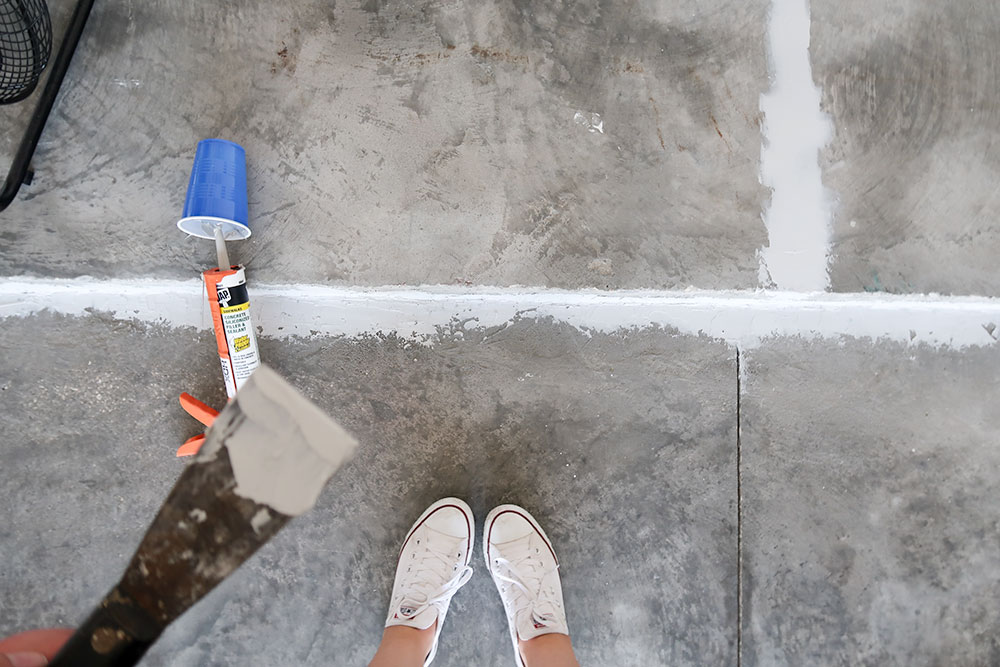
The next morning, I went outside and the floor was pretty much dried, except around the small cracks. At this point, I moved onto the etching part. This is the exact same process as the degreaser, but the liquid actually started to bubble up when dissolved into water. It was much more satisfying. I continued to scrub and use the pressure washer during this process, too. I etched the concrete twice. During this, I slid the fridge from one corner to the other corner and so on, until everything was evenly cleaned and etched. I left the garage door open and had two fans going to help move the drying time up. Later that same evening I filled in the cracks with the concrete sealer and caulk gun. In our garage we have a step and that’s mostly where I focused placing the concrete sealer. With a flexible putty knife, I smoothed out any areas that had excess product on it. I flipped the lights off and left the garage until the following morning when I was ready to epoxy!
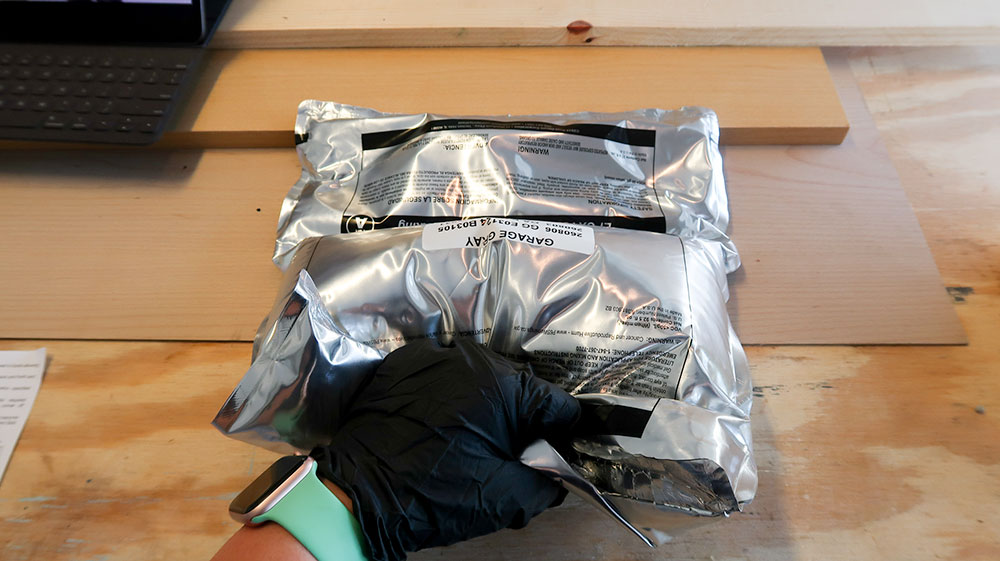
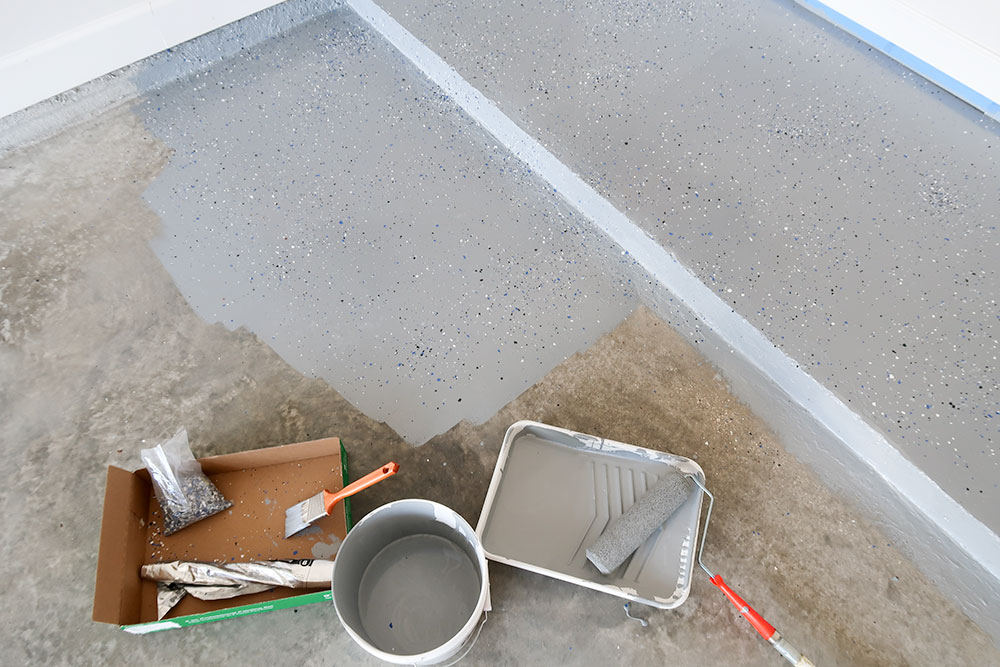
When I woke up that morning, I checked the weather – which conveniently was cool enough to let me work with the epoxy for two full hours. You’ll get a direction paper inside the box that will explain optimal temperatures and how long you have to mix the epoxy before taking it out of the bag. Being by myself, I thanked the weather gods for the time, I figured I’d only have one hour tops before it started to dry and harden. After I mixed up parts A and B, I poured it into my 5 gallon bucket with the lid loosely laying on top. I took out as much as I needed at a time onto a roller tray and began the painting process. I painted the epoxy in 6×6 sections moving from the back of the garage to the front – only on the left side of the garage. I did paint the step (over the newly laid down concrete) and part of the wall until I hit the bottom of the trim. I stopped where the garage door met the outside concrete. In the time I was painting the 6×6 sections, I would take the paint chips and essentially throw them into the air creating a random pattern. I learned that if you just threw the paint chips directly at the wet paint, it would start to get clumpy and look bad.
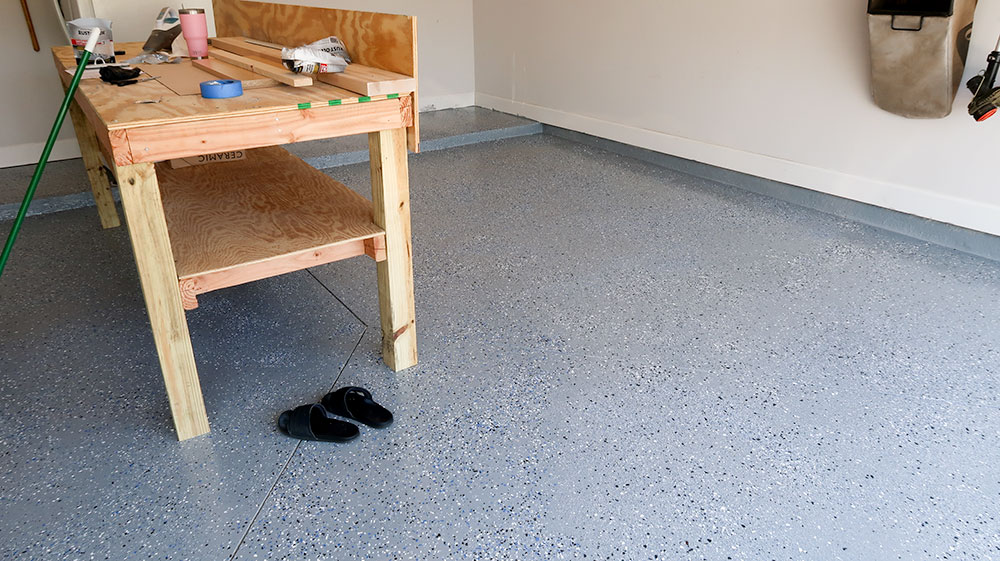
Earlier in this post I said I had a few things that were staying inside the garage, and here’s the reason why – I split the epoxy into a two day process so that I did not have to remove the refrigerator from the step on the garage and same with the work bench. Yes, I was worried about ruining the fridge, but I was also worried if there was a line down the center of my garage, I’d never get over it. I decided to take the gamble and guess what, IT WORKED. Phew. You cannot actually tell where I stopped on day 1 and continued on day 2. Speaking of day 2, I moved everything from the left unpainted side to the newly dried side. I repeated this process until the entire garage had even amounts of paint and chips. I only had two mishaps where I accidentally painted the wall, which is pretty good in my book! I got pretty tired at the end of day 1 and was too concentrated on Top Chef to notice my roller slid its way down onto the driveway. No clue how to clean up that small mark, but I’m hoping with rain and driving on it frequently, it’ll disappear. Keep ya posted. And the even bigger mistake was running out of paint chips. BUY ALOT if you plan on having a lot of paint chips in your epoxy like I did. Midway through day 2, I had to rush to ACE to buy more. Luckily, there is one within 5 minutes from my house. Unluckily, they only had black and white chips. I grabbed that bag and bolted to Home Depot to grab their last bag of only blue chips. When I got home, I mixed the two bags and the crisis was averted.
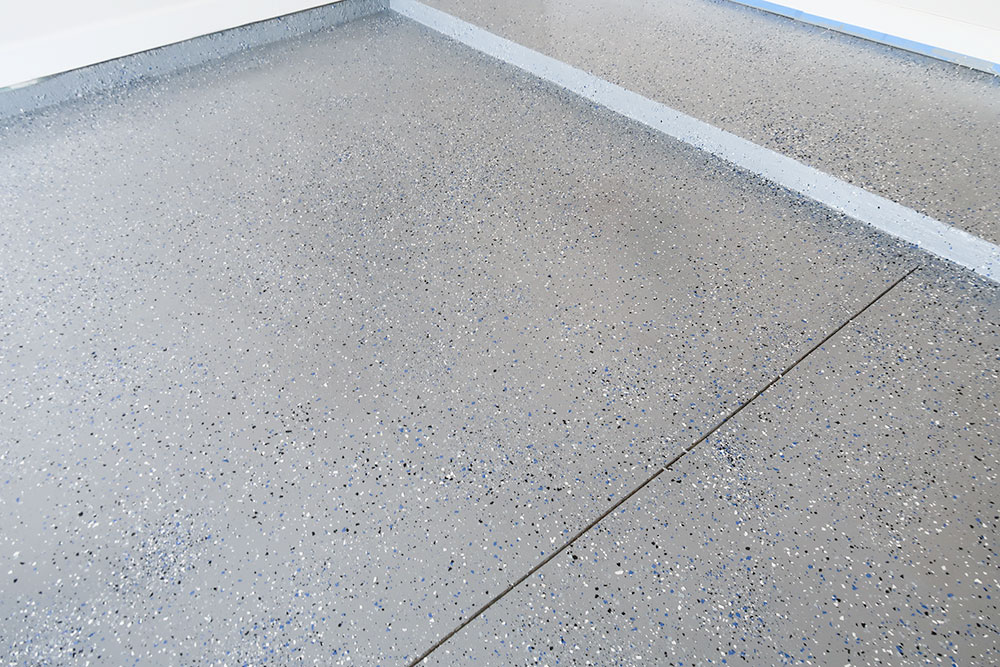
All in all, this was a fun, easy project for someone that had no clue what they were getting themselves into. AKA me. This brand of epoxy paint only needed one coat and it took a good 24 hours (or less depending on where you live) to dry. I waited 4 more full days before I pulled my car inside the garage. Every time I open the outside door and see the job I managed to pull off, I smile. It was a way cheaper and better alternative to hiring someone.
Products I used and cost:
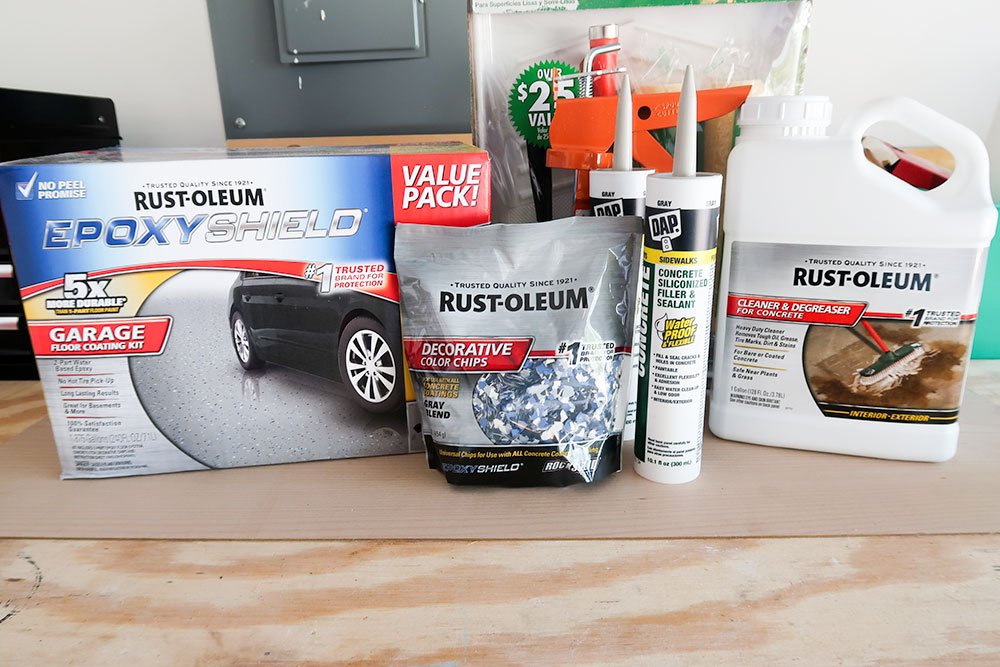
- Rust-oleum Epoxyshield: I used the Light Grey 2 and 1/2 Car Garage Kit on our floors. There are several other choices, but I stuck with my gut and grabbed this one. It came with the white, black and light blue paint chips. For me, the decision took about 3.1 seconds. It was $117.
- Rust-oleum Decorative Chips: The box contains two bags (one bag if you get the one car garage paint) so I grabbed an extra bag of this. In hindsight, I should have purchased two before I ran out. It is entirely up to personal preference of how scattered you want the chips. Since our garage is a higher traffic area, I used 4 full bags. Per bag, it was $9.97.
- Rust-oleum Cleaner and Degreaser: Here’s the cleaner I used. It wasn’t until the second and third round of scrubbing that I started to notice a difference. It will be so slight and you may be like me scratching your head wondering if it is working. I highly recommend using the entire bottle, you’ll get a good 4-5 cleans out of it. It was $17.97.
- Caulk Gun and Concrete Sealer: This is optional, but we did have a couple cracks in our concrete that needed filling. I went with a grey color to match the existing concrete to know when it was dried. The gun was $3.97 and the sealer was $5.28.
- Deck Scrub Brush Head: Pretty straight forward, a scrubber to de-grease and also etch the concrete. It was $5.98.
- Wooden Pole: (dual purpose for the scrub brush and the painting) I purchased the cheap and cheerful one. Of course there are metal options, but I did not know what the next project I was going to need it for was, so to keep the costs down I went with this. It was $6.97.
- 8-Piece High-Density Paint Tray Kit: I grabbed this because it was affordable and had everything I needed, regardless of wanting to use it again or throw it away. It was $10.97.
- A 5-Gallon Bucket: I did not need to purchase one, as I already had one, but I went ahead and linked it for your shopping pleasure. Home Depot has them for cheap. An old mop bucket will work, too. It is $3.48.
- Blue Painters Tape: I had extra lying around in my garage. Any will do, but linked the brand I still have used for years. I only marked off the door and some of the trim. It was $3.97 for a roll.
The total for all of the supplies was roughly $178. There are other things you can add or take away, but for under $200 – I’m really happy with the result. I did not add a non-skid mixture into the epoxy nor did I add a top coat, but feel free to add them if they are necessary for your garage! I borrowed a pressure washer from a neighbor to make the process a whole hell of a lot easier, if you don’t have access to one – use a hose.
Tips I learned:
- Check the weather, the packaging is pretty specific with the amount of working time the epoxy product has
- Once you think the floor is clean, clean it again. This is cannot stress enough.
- If you have extra hands, the project will go quicker with more than one person. At that rate, you’d likely not have to split the project into multiple days like I had to. Also it’s always helpful when someone can help you move large objects.
- BUY EXTRA CHIPS, I can’t tell you the disaster I had with running out of the paint chips. The cool thing is if you don’t end up using them all, you can return them!
I know this blog is mostly makeup reviews and travels, but I really am enjoying all of the projects around the home that I’ve been sharing. If you’d like to see daily projects and updates, be sure to follow my Instagram. I’m so grateful that YOU have enjoyed it as well and taken the time to read this far. The encouraging messages have given me a newfound spark to continue to stay active here after being missing for a few years. I make sure I get back to all of the messages (even if they are delayed) I have been receiving and truly thankful for my little space on the Internet to have these conversations. Seriously, thank you.